While this isn't a problem when there's no fish, we all know what it's like to get hit by a big pollack unexpectedly. The rod is practically wrenched from your hands and either you give it some line or hang to that rod for grim death! If the line is wrapped around the tip and you can't give any line to that first dive of a big pollack, something will break. Either the line, the rod tip, or worst of all, the rod itself gets pulled out of the your hands.
So what can you do to minimise the risk of having a loop of line wrapped around your rod tip, impeding the release of line from the drag, just at the moment when a big pollack hits your lure? One solution is to flip your rod upside down while you jig, so that all the rings are underneath. But then you lose that direct contact with your reel and when a fish hits, you have to faff about swinging the reel round and start fighting the fish.
 |
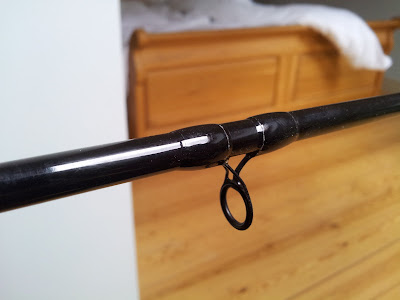
| When a puppy like this hits your lure, you really don't want your line just at that moment to be tangled around your rod tip! The rod in this photograph is the rod I chose to change to a spiral wrap. |
A better solution is to have a reel that is mounted upwards for access, so that your thumb can rest on the spool to add extra drag if needed and you can make use of the trigger grip, but to have the rod's guides mounted downwards to prevent loops of line being wrapped around the rod tip as you jig your lure. For this to work, the line must twist around the blank, starting on top and ending up underneath it.
This is actually a lot less crazy than it sounds. Generally there are two objections. The first worry is that if the butt guide is off centre, then the line will build up during the retrieve on one side of the reel. This isn't an issue. Under tension in fact, as the photographs below show, the line pulls downward towards the centre of the ring rather than going over the side, therefore the amount of offset is less than you might think. The second fear is that it's a lot of work adjusting an existing rod, and you'll have to alter a whole lot of guides to get it to twist round gradually. Actually the reverse is true. You want to get that line underneath the rod as quickly as possible. Unless you're actually using the rod for casting lures, then you can get the line underneath the rod in as little as two offset guides.
Spiral Guide Placement
Spiral Guide Placement
The standard set up for a jigging rod from the kayak is an up-facing multiplier reel in a standard or trigger grip handle. Bear in mind the method I'm showing here is not intended for a casting rod. This a jigging rod, so the requirement for the smoothest possible transition of the line around the rod from the top to underneath isn't as critical as it might be. A jigging rod simply has to let the lure sink, jig the lure, strike and land the fish! Given the lures are often quite heavy for sea fishing, such as pirks, big shads, or butterfly jigs, the line should run out freely without any undue friction. But as we'll see, switching the course of the line from top to bottom doesn't necessarily introduce any more friction than having guides all mounted in the same direction.
All that was a long winded way of saying I don't think you need to re-wrap more than the two lowest guides for a jigging rod (this is assuming a two piece rod). A casting rod might need 3 or 4. Of course, if you were doing a proper job, or building a rod like this from scratch, or you if have a one piece blank, then you should remove all the rings and re-wrap them. Why? Because any rod with the guides mounted facing upwards needs far more rings than the same rod if the rings are mounted downwards, as the former needs to keep the line off the blank when the rod is bent. A rod with down facing guides doesn't have that problem, so the number of guides can be reduced saving a little weight and improving its looks.


 Now you could have simply divided 180 degrees by 3 and got your two offset angles (60 and 120). That might work equally well. However I wanted to make sure my line followed the best line for when the rod was under strain, and that means that the distance between the guides and the usual curvature of the rod have an effect of how the offset angle should be increased. After the eyes are whipped on, I start loaded the rod with heavier weights to see how the line sits in the guides as it transitions around the rod. I try to have the line sitting plumb in the bottom of the ring under a medium to heavy load. I'm not too bothered that the line may move around the outside edge of the guide under light loads (i.e. just lure weights), but when a fish is on I want maximum strength and stability.

All that was a long winded way of saying I don't think you need to re-wrap more than the two lowest guides for a jigging rod (this is assuming a two piece rod). A casting rod might need 3 or 4. Of course, if you were doing a proper job, or building a rod like this from scratch, or you if have a one piece blank, then you should remove all the rings and re-wrap them. Why? Because any rod with the guides mounted facing upwards needs far more rings than the same rod if the rings are mounted downwards, as the former needs to keep the line off the blank when the rod is bent. A rod with down facing guides doesn't have that problem, so the number of guides can be reduced saving a little weight and improving its looks.
Decide which guides you're going to re-wrap. Start cutting across the guides with a secure razor blade or sharp knife, such as a craft knife or scalpel.


Chances are that the old wraps will come off quite neatly and any scratches you made to the blank should be covered by the new wraps. Beware if your blank has a painted finish - be careful to to remove any paint from outside the areas covered by the thread. You want to try and keep this job so that you can just varnish over the wraps and the rod will look the same as it did before.
Next move the top section of the rod so that all the guides face downwards. Using some masking tape, try some offset positions with the rod loaded with a light weight. Which side should the guides start their spiral? Well I guess this may depend on how you hold your rod. If you feel the twist in the line would be better going away from your arm, then start the offset on the opposite side. I personally don't think the line gets in your way however you hold your rod, but you may feel differently.

The easiest way of trying to estimate the best offset position s is to look at where the line touches the bottom of the ring. It should be plumb centre when under load. You'll probably find that the butt guide barely moves the line position from where it was originally when not under load, and even under load, the line is only slightly off centre going towards the reel. If you can keep it dead centre then do so. This will mean the line build up on your reel will be exactly the same as it was before. Generally you have to alter the line's route a little to one side starting with the butt guide, particularly if you're only using two rings to route the line under the rod. Of course, if you have a level-wind reel none of this will worry you and you can fix the guide's offset position as you like!
Once you're satisfied with the guide positions, wrap them in place. If you're not sure how to do this, take a look at the series I did on renovating an old rod, full instructions and links to other guides are there. I'd still test the guide positions before you apply the finish, just in case you're not happy with their offset position. It's much easier to undo and re-wrap an unvarnished guide!

This is the finished rod after varnishing, taken from the side. You can see the butt guide on the left offset about 50 degrees from the vertical, with the next guide set at about 100 degrees.


By zooming into the above picture (apologies for the poor quality), you can see how under load the line sits at the base of the guide and when it reaches the reel it is pretty much central.


I'm pleased with the outcome of the re-positioning the guides. I think it gives the best of both worlds: a rod that is less prone to the braid getting tangled up around the top guides during the slack line part of the "drop" while jigging, and a reel position that allows me to use the trigger grip as intended and apply some extra drag force to the spool with my thumb. I really think this is the best solution for a jigging rod, and I can't see any reason why more rods are set up with spiral guide placements.
I'd be interested in any feedback you might have on this solution. I've not seen it before in the UK, but I know spiral placements have been around for some time in the US.
No comments:
Post a Comment