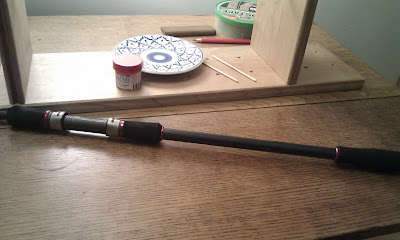
The kits make the process relative straightforward. Having everything pre-drilled for a 16mm carbon tube is obviously quicker than reaming out the interior diameter hole of EVA or cork grips to the correct size and taper of the rod blank. Once you have the handle assembled, it's then a relatively simple process of mounting the whole lot onto your blank.
As it comes, everything has to be glued up, even the Fuji reel seat whose front grip creates the down-tightening split-grip handle. I used a fast setting glue (ProBond).
Make sure you put all the winding checks in place (loose) before you start glueing any handles. Note that winding checks have direction...
You should also mark the end of the tube where the butt cap comes against. This lets you first glue the rear EVA handle in place and then glue the butt cap up against it.
Once you're satisfied with the placement and tube length, then you can go ahead and glue the top half of the split handle onto the Fuji reel seat. Don't forget to put the the trim ring on first, then smear it with glue, then push down onto the ring. You will probably find a good deal of glue is pushed up against the edge of the EVA handle, which will then glue the trim ring. Once you've got them glued, you can start making the reel seat arbours. I use masking tape, as I'm cheap and lazy, and because it works!
As you can see the reel seat is right at the end of the mounting tube. You want a snug rather than a tight fit - too tight and you won't get it on over the glue, or worse, it rubs off most of the glue as you push it on. You can then either glue up the rest of the handle components except the butt cap, or mount the tube on the blank and glue them up afterwards, the choice is yours. I used three arbours for the tube, but to be sure you might want to make that four. To be honest there isn't much flexing going at the bottom of this blank and the tube is very stiff given its length.
Finally there's just the fiddly bit of glueing the winding checks up against the EVA handles and then you're done:
 |
| Finished handle, cleaned up from excess glue and looking quite nice. |
Next article in this series, I talk a little about finding the rod spine, and Fuji's concept guide system for guide placement. Tight lines until then.


Hello Kester
ReplyDeleteThe kit looks as if it’s going to give a very professional finish, and of course your craftsmanship adds to that finish. I have to agree with your final assessment on putting a blank over a blank. Not the best thing to do as you might be strengthening the butt and inadvertently weakening the tip by changing the original bend the rod was designed for under stress. But all in all top marks.
Look forward to your next post.
Happy Fishing. Frank
The kits make the process relative straightforward. Having everything pre-drilled for a 16mm carbon tube is obviously quicker than reaming out the interior diameter hole of EVA or cork grips to the correct size and taper of the rod blank. Once you have the handle assembled, it's then a relatively simple process of mounting the whole lot onto your blank.
ReplyDeletecricut dragon
cricut fish designs